How To Get Affordable Solar Roof Tiles

Solar roof tiles are transforming the way we think about energy. They offer a sleek, modern alternative to bulky solar panels. These tiles blend seamlessly with your roof, enhancing your home’s aesthetic appeal. But how can you make them affordable? Understanding the costs and benefits is crucial. Solar shingles price can vary widely, influenced by several factors. Brand, installation complexity, and location all play a role. Yet, there are ways to find affordable solar solutions. Government incentives and tax credits can significantly lower costs. Financing options also make solar roof tiles more accessible. Choosing the right installer is key to maximizing savings. Comparing quotes can help you find cost-effective solar options. This guide will walk you through the process. Learn how to get affordable solar roof tiles and enjoy long-term energy savings. What Are Solar Roof Tiles? Understanding the Basics Solar roof tiles are an innovative roofing option. They look like regular shingles but harness the sun’s energy. This makes them a smart choice for green energy enthusiasts. These tiles come as part of your roof, not just an addition. The result is a discreet and efficient energy solution. Their design allows them to seamlessly match different roofing styles. Solar roof tiles work by using photovoltaic cells. These cells convert sunlight into electricity, which powers your home. This process helps decrease reliance on traditional energy sources. Key features of solar roof tiles include: Selecting the right type can increase your home’s value and lower energy costs. Consider your roofing needs and local climate when choosing tiles. Opting for solar roof tiles is both a stylish and sustainable step. Solar Shingles vs. Traditional Solar Panels: Key Differences Both solar shingles and traditional solar panels harness the sun’s energy. However, they differ in design, installation, and aesthetics. Understanding these differences can help you decide which option suits your home best. Solar shingles blend seamlessly with your roof. Unlike bulky solar panels, they provide an integrated look. This makes them appealing to homeowners concerned about their property’s appearance. Traditional solar panels often require mounting racks. These racks can affect your home’s exterior aesthetic. However, panels might offer higher efficiency depending on the model. Here’s a quick comparison: Installation processes also vary significantly. Shingles demand more time as they replace existing roofing. Conversely, panels can be set atop your current roof. Assessing both the cost and energy needs can guide your decision between the two. Solar Shingles Price: What Affects the Cost? The cost of solar shingles can vary significantly. Factors such as brand, roof size, and installation complexity play crucial roles. Understanding these elements can help you manage expenses effectively. Brand Choice: Different manufacturers offer various pricing and features. Some brands, like CertainTeed, provide more budget-friendly options. In contrast, Tesla’s Solar Roof might come at a premium due to innovative design. Roof Size and Complexity: Larger roofs require more materials and labor. Additionally, complex roof designs, such as those with multiple angles or obstacles, add to installation costs. Factors to consider: Geographic Location: Where you live can impact pricing. Installation costs might increase in remote areas due to limited availability of certified professionals. Local labor rates also fluctuate, affecting overall expenses. Government Incentives: Incentives and tax credits can reduce costs substantially. They vary by region but are worth considering during your budgeting phase. Factors affecting price: To find an affordable solution, gather quotes from multiple installers. This approach allows you to compare prices and offerings. Ultimately, awareness of these factors can enable smarter financial planning for your solar roofing project. When making a final decision, prioritize long-term savings over upfront costs. Solar shingles not only add value to your home but can also lower energy bills. Evaluating costs from a broad perspective ensures a wise investment. Top Affordable Solar Roof Tile Brands and Options Choosing the right brand for solar roof tiles involves careful consideration. Various brands offer affordable and reliable solutions for homeowners. 1. CertainTeed: Known for quality and affordability, CertainTeed offers solar shingles that blend seamlessly with traditional roofing. They cater to both function and aesthetics, making them a favored choice. 2. Luma Solar: This brand provides customizable solar shingles designed to mimic asphalt and slate tiles. They offer durability and efficiency at competitive prices. Key Features: 3. Tesla Solar Roof: While initially perceived as costly, Tesla aims to make solar solutions more accessible. Their innovative designs promise excellent energy performance and a sleek appearance. 4. GAF Energy: As a leader in roofing materials, GAF offers comprehensive energy solutions at affordable rates. Their solar shingles are designed to integrate seamlessly with their other roofing products. Key Features: 5. SunTegra: Known for simplified installation and cost-effectiveness, SunTegra’s solar tiles are a great option. They focus on reducing labor expenses by easing the installation process. Researching these brands can help you find the best fit for your home and budget. Comparing offerings based on efficiency, design, and durability ensures you choose wisely. It’s essential to consider the long-term benefits each brand provides. Affordable solar solutions can lower energy bills, increase home value, and contribute to a sustainable future. Partnering with a brand that aligns with your goals will maximize the return on your investment. How to Get Affordable Solar Roof Tiles: Step-by-Step Guide Finding affordable solar roof tiles involves a strategic approach. Follow these steps to ensure you get the best deal. 1. Assess Your Roof Needs First, evaluate your roof’s condition and space. Ensure it can support solar tiles. Consider its orientation and the amount of sunlight it receives daily. 2. Research Local Solar Providers Look for reputable solar installation companies in your area. Local providers may offer competitive prices and better support post-installation. 3. Compare Solar Shingles Price Gather quotes from multiple companies. Make sure to compare the price of solar shingles, including installation and potential additional costs. 4. Explore Affordable Solar Solutions Investigate different brands to find affordable solutions. Some manufacturers offer budget-friendly models that provide good efficiency. 5. Evaluate Financing Options Look for financing plans that suit your
How to Install Hardie Board Siding
Hardie board siding is a popular choice for homeowners seeking durability and style. This fiber cement siding offers a blend of strength and aesthetic appeal. Installing Hardie board siding can enhance your home’s exterior while providing long-lasting protection. Proper installation is key to maximizing its benefits. This guide will walk you through the installation process step-by-step. You’ll learn about the tools and materials needed for a successful project. Safety is crucial when working with fiber cement siding. We’ll cover essential safety tips to ensure a smooth installation. Understanding the costs involved can help you budget effectively. We’ll discuss factors that influence siding installation cost. Maintenance is minimal, but important for longevity. Discover how to keep your Hardie board siding looking its best. Explore the benefits and options available with Hardie board siding. This guide will help you decide if it’s right for your home. What is Hardie Board Siding? An Overview Hardie board siding, made from fiber cement, is renowned for its strength and resilience. This material is a blend of cement, sand, and cellulose fibers. Fiber cement siding is an excellent alternative to wood and vinyl. Its robust nature helps it withstand harsh weather conditions. Produced by James Hardie, this siding type is designed to mimic various exterior finishes. It can resemble the appearance of wood, stucco, or even stone. Here are some key features of Hardie board siding: Hardie board siding is available in numerous styles and colors to suit diverse preferences. Whether you’re looking to update your home’s look or increase its value, this siding offers a versatile solution. Benefits of Hardie Board Siding Hardie board siding offers numerous advantages that make it a popular choice among homeowners. It is especially favored for its impressive durability and versatility. A significant benefit is its resistance to environmental threats. This siding material withstands fire, pests, and severe weather conditions, making it ideal for various climates. Hardie board siding is also low maintenance. It requires only occasional cleaning, with repainting needed every 10-15 years, making it an economical choice. Key benefits of Hardie board siding include: By selecting Hardie board siding, homeowners can enhance curb appeal and investment value. Its adaptability in style and color allows customization to fit individual home designs effectively. Tools and Materials Needed for Hardie Board Siding Installation Before starting the installation, gather all necessary tools and materials. Proper equipment will ensure a smooth and safe process. The primary tool needed is a circular saw, equipped with a fiber cement blade, crucial for precise cuts. Another essential is a nail gun, which offers secure fastening of the boards to the structure. Additional tools and materials include: Having these items on hand will streamline the installation of Hardie board siding. Ensuring all safety equipment, like masks and goggles, will also protect you during the cutting process, avoiding dust inhalation and providing a safer workspace. Preparing for Installation: Planning and Safety Proper planning is critical before starting your Hardie board siding installation. Careful preparation can prevent potential issues and ensure a successful outcome. Start by assessing the weather conditions. Ideal installation occurs in dry weather, which ensures proper adhesion and reduces risk of moisture damage. Next, focus on safety. Safety gear is vital, as fiber cement can produce dust harmful to health. Always use: Before installation, check your local building codes. Some projects might require permits or additional inspections to comply with regulations. This step will help avoid complications later. Finally, measure the surface accurately. Precise measurements ensure the right fit and reduce material waste. This attention to detail is crucial for a professional look and long-lasting results with your new siding. Step-by-Step Hardie Board Siding Installation Guide Embarking on a Hardie board siding project requires a structured approach. Follow this step-by-step guide for best results. The installation process involves several key stages. These include preparing the surface, measuring and cutting, and ensuring secure fastening. Each stage is crucial for a smooth installation. Tools such as a circular saw with a fiber cement blade, levels, and nail guns are essential. Protective equipment like masks and goggles are also important. Here’s what you’ll need: Taking your time with each stage ensures the siding not only looks great but also performs well for years to come. Let’s break down each crucial step. 1. Surface Preparation and Moisture Barrier Before installation, prepare your surface thoroughly. Clear it of debris and ensure it’s even. Next, install a moisture barrier to protect the structure. This step is vital for preventing water damage. 2. Measuring and Cutting Hardie Boards Accurate measurements are key. Measure your area carefully to ensure precision. Cut the Hardie boards using a circular saw. This tool allows for cleaner, straighter edges. 3. Installing Starter Strips and First Course Starter strips provide a strong base for your siding. Install them level with the bottom edge of your wall. Once installed, begin with the first course. Align it with the starter strip for a solid start. 4. Attaching Hardie Boards: Fastening and Sealing Securing the boards correctly is vital. Use nails and sealant to keep each board in place. Nails should be driven into studs for a firm hold. Ensure they are flush with the board’s surface. 5. Overlapping, Seams, and Finishing Touches Each board should overlap the previous one slightly. This overlap helps in water drainage. Seams require careful attention. Apply caulking to ensure they are watertight. Finally, inspect your work. Ensure all boards are aligned, secure, and that seams are sealed well. This careful attention to detail will guarantee a professional finish. Special Considerations: Hardie Board and Batten Siding Installation The board and batten style offers a classic, charming look. It involves alternating wide boards and narrow strips, known as battens. This style requires precision and planning. Focus on alignment and consistent spacing to achieve a clean visual. Using different tools, like a chalk line, can aid in maintaining straight lines. A little time spent planning will save time during the installation process. Consider these tips: The James Hardie
How Long Does a Flat Roof Last
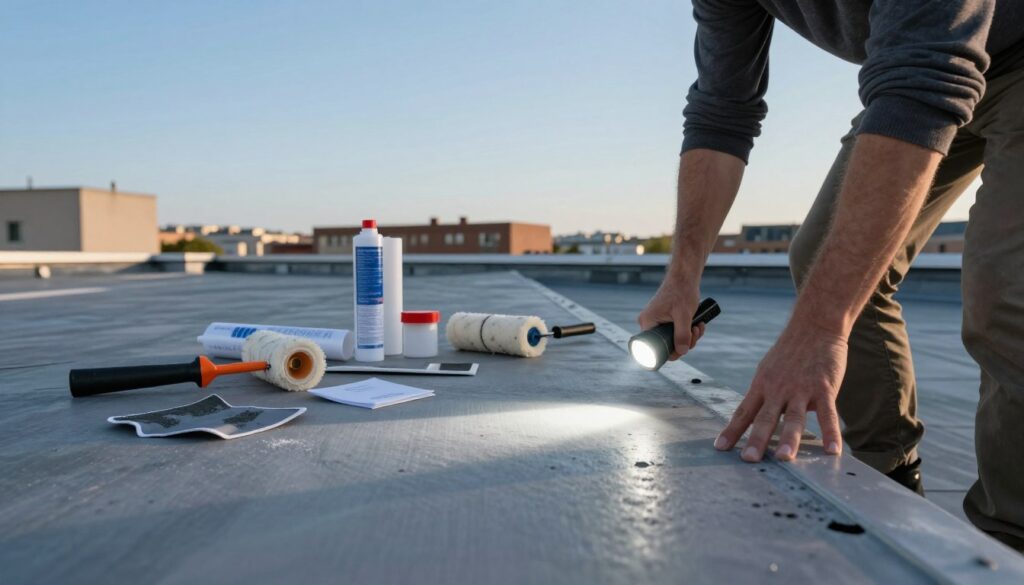
A flat roof is a favorite for many buildings because of its modern look and practicality. But, people often wonder how long it lasts. The lifespan of a flat roof varies based on several things. These include the type of material, how well it’s cared for, and the weather. With good care, a flat roof can last for many years. The weather, how well water drains, and the roof’s material quality all matter a lot. Key Takeaways Understanding Flat Roof Systems It’s key for building owners and managers to grasp the details of flat roof systems. This knowledge helps ensure they last a long time. Flat roofs aren’t perfectly flat; they have a slight slope to help water run off. What Defines a Flat Roof A flat roof has a very small slope, usually under 10 degrees. This makes it different from pitched roofs. It needs special materials and installation to be flat roof durable and flat roof long-lasting. Common Flat Roof Applications Flat roofs are often seen in commercial buildings but also in modern homes. They’re used for: Advantages and Limitations of Flat Roofs Flat roofs have benefits like extra space and easy maintenance access. But, they also have downsides, such as: Advantages Limitations Extra space for recreation or equipment Potential for water pooling and leaks Easier maintenance access Higher risk of damage from foot traffic Structural Considerations The strength of a flat roof is vital for its long life. The building’s design, materials, and environment all affect its durability and longevity. Knowing these details helps building owners make smart choices to extend their roof’s life. How Long Does a Flat Roof Last: Average Lifespans Flat roofs last different lengths based on several important factors. Knowing these factors helps building owners and managers make smart choices about upkeep, fixes, and new roofs. Typical Lifespan Range A flat roof can last from 10 to 30 years if well cared for. But, this time frame changes a lot. It depends on the roof’s material, how it was put in, and the weather around it. Comparing Flat Roofs to Pitched Roofs Flat roofs don’t last as long as pitched roofs. Pitched roofs can go over 30 years. But, flat roofs need to be replaced more often because of their design and drainage problems. Historical Improvements in Longevity Roofing tech has gotten better over time, making flat roofs last longer. New materials and ways of installing roofs have helped a lot. Traditional Systems vs. Modern Materials Older built-up roofing (BUR) systems are now mostly replaced by newer stuff like EPDM, TPO, and PVC. These newer materials are more durable and better at standing up to the weather. Technological Advancements New tech, like single-ply membranes and advanced coatings, has really helped flat roofs last longer. These advancements protect against UV rays, water damage, and other weather stressors. Roofing Material Average Lifespan Built-Up Roofing (BUR) 15-20 years EPDM (Rubber) Membranes 20-25 years TPO (Thermoplastic Polyolefin) 15-20 years PVC (Polyvinyl Chloride) 20-25 years The table shows different roofing materials have different lifespans. Knowing this helps pick the best material for a building project. “The key to maximizing the lifespan of a flat roof lies in proper installation, regular maintenance, and the selection of high-quality materials.” – Roofing Expert Different Flat Roof Materials and Their Durability The lifespan of a flat roof greatly depends on the material used. Different materials have varying durability, maintenance needs, and costs. Built-Up Roofing (BUR) Built-Up Roofing (BUR) uses layers of roofing felt or fabric with bitumen. It’s very durable and weather-resistant. Traditional Tar and Gravel The traditional tar and gravel method uses hot tar and gravel on the roof. It’s strong and can handle heavy use and bad weather. Modern BUR Systems Modern BUR systems are better and more eco-friendly. They include torch-down and cold-applied methods. These systems are as durable as traditional BUR but easier to install. Modified Bitumen Modified Bitumen roofing uses bitumen sheets on the roof, often with a torch. It’s very durable and waterproof, and can move with the building. EPDM (Rubber) Membranes EPDM membranes are made of synthetic rubber. They resist UV, ozone, and extreme temperatures well. They’re easy to install and fix, making them a good choice for roofs. TPO (Thermoplastic Polyolefin) TPO membranes are single-ply and resist UV and chemicals well. They’re energy-efficient, as they can be white to save on cooling costs. PVC (Polyvinyl Chloride) PVC roofing membranes resist chemicals, fire, and UV. They’re flexible and last a long time, making them good for complex roofs. Liquid Applied Membranes Liquid applied membranes are a liquid coating that cures to a waterproof layer. They’re great for different roof shapes and last a long time. Each material has its own pros and cons. The right choice depends on the climate, budget, and building needs. Knowing about the durability and upkeep of each material is key to a long-lasting roof. Key Factors Affecting Flat Roof Lifespan Knowing what affects a flat roof’s lifespan is key for upkeep and longevity. Several important factors play a big role in how long a flat roof lasts. Climate and Weather Conditions Weather and climate greatly impact a flat roof’s lifespan. Different environmental factors can wear it down, affecting its durability. UV Exposure Impact UV rays can make roofing materials brittle and crack over time. Using UV-resistant coatings or membranes can help protect against this. Freeze-Thaw Cycles In cold areas, freeze-thaw cycles stress flat roofs. Water seeping in and freezing can cause cracks and damage. Wind Damage Strong winds can lift and damage roofing materials, if they’re not securely attached. Making sure the roof is well-attached and reinforced can prevent wind damage. Installation Quality and Workmanship The quality of installation and workmanship is vital for a flat roof’s lifespan. Poor installation can cause leaks, structural problems, and early aging. Drainage Efficiency Good drainage is key to prevent water buildup, which can harm flat roofs. It’s important to keep drains clear and working well. Foot Traffic and Roof Usage Heavy foot
Do Flat Slop Roofs Better Then a Gable Roof

Choosing the right roofing system can be tough for homeowners. Flat slope roofs and gable roofs are two common choices. Each has its own pros and cons. Looking at the comparison of flat and gable roofs is key. Professional roofing companies and roofers play a big role. They help homeowners pick the best option for their needs. We’ll dive into the specifics of both roofing types. We’ll look at their durability, upkeep, and looks. By the end, you’ll know which roof is right for you. Key Takeaways Understanding Roof Types: Flat Slope vs. Gable Choosing the right roofing for your home is important. Knowing the difference between flat slope and gable roofs is key. Homeowners often talk to roofing experts to find the best roof for them. What Defines a Flat Slope Roof A flat slope roof, also known as a low-slope roof, has a very small slope, less than 4:12. It’s popular in modern homes and commercial buildings. Flat slope roofs look sleek and offer extra space on the rooftop. What Constitutes a Gable Roof A gable roof is a classic choice, with two sloping sides meeting at a ridge. It’s a triangular shape that drains water well and adds attic space. Gable roofs are loved for their simplicity, strength, and versatility in design. Key Structural Differences Flat slope and gable roofs differ in design and function. Flat slope roofs need more upkeep because of water pooling. Gable roofs drain water better. Here’s a table showing their main differences. Characteristics Flat Slope Roof Gable Roof Slope Less than 4:12 Typically between 4:12 and 12:12 Water Drainage Prone to water pooling Excellent water drainage Additional Space Potential for rooftop usage Provides attic space Knowing these differences helps homeowners make better choices about their roofs. They might get advice from professional roofers. The Advantages of Flat Slope Roofs Flat slope roofs are known for their unique mix of function and style. They are a popular choice for many homeowners and builders. Let’s look at why they are so appealing. Cost-Effectiveness and Installation Simplicity Flat slope roofs are cost-effective. Their simple design makes them easy and quick to install. Initial Investment Considerations The cost of a flat slope roof is often lower than other options. This is because they need less labor and materials. Reduced labor costs and fewer materials save money. Labor Requirements and Timeframes Installing flat slope roofs takes less time and labor. Their simple design avoids complex angles and slopes. This makes them great for projects with tight deadlines. Additional Usable Space Opportunities Flat slope roofs offer a chance to add more space. This is a big plus for homeowners wanting to use their property fully. Rooftop Gardens and Green Roof Options Rooftop gardens and green roofs are gaining popularity. They add insulation and create a peaceful spot in cities. We can find green roof options for different needs and budgets. Solar Panel Installation Benefits Flat slope roofs are perfect for solar panels. They save on energy bills and cut down on carbon emissions. Benefit Description Cost-Effectiveness Lower initial investment and reduced labor costs. Additional Usable Space Opportunity to create rooftop gardens or install solar panels. Modern Aesthetic Appeal Contemporary design that enhances the visual appeal of a building. Modern Aesthetic Appeal Flat slope roofs are linked to modern architecture. They offer a sleek, contemporary look that boosts a building’s appeal. Energy Efficiency Considerations These roofs can be made energy-efficient. They can include green roofs or solar panels to lower energy use. The Benefits of Gable Roofs Gable roofs have many advantages, like better water drainage and more attic space. They are popular in many architectural styles because of these benefits. Superior Water Drainage Capabilities Gable roofs are great at letting snow and water slide off. This helps prevent water buildup and leaks. It’s very useful in places with lots of rain or snow. Enhanced Attic Ventilation and Space Gable roofs also give you more attic space. You can use this space for storage or even make it into a living area. Improved Air Circulation Benefits Good attic ventilation is key for a healthy home. Gable roofs help with air flow. This can lower your energy bills and make your home more comfortable. Storage and Living Space The extra attic space can be used for many things. You can store items or even make it into a bedroom or play area. This makes your home more valuable. Traditional Architectural Appeal Gable roofs are often seen in traditional homes. Their classic look can make your home look better and possibly increase its value. Wind and Weather Resistance Even though gable roofs have many benefits, they need to be built right to withstand wind and weather. Skilled roofers are important to make sure gable roofs last long. Benefits Gable Roofs Water Drainage Superior Attic Ventilation Enhanced Architectural Appeal Traditional In conclusion, gable roofs are a great choice for homeowners. They offer many benefits, from better water drainage to a classic look. Gable roofs are both practical and stylish. Do Flat Slop Roofs Better Then a Gable Roof : A Comparative Look Comparing flat slope and gable roofs shows big differences in durability, upkeep, and how well they handle the weather. These differences can really affect your choice of roof. Things like the weather, your budget, and what you like can help decide which roof is right for your home. Durability and Lifespan Analysis Looking at how long each roof lasts, we see that gable roofs often last longer. They do a better job of shedding water and snow. But, new roofing tech has made flat slope roofs more durable too. This makes them a good choice for many homeowners. Maintenance Requirements Comparison When picking a roof, thinking about upkeep is key. Flat slope roofs need more care because water can pool and cause leaks. Gable roofs are easier to keep up with because water and debris slide off. Regular upkeep can make either roof last longer. Climate Suitability Assessment The
How to Fix a Cracked Flue Liner

Your chimney inspector just used three words that sound both expensive and dangerous: ‘cracked flue liner.’ While the diagnosis is serious, understanding the problem is the first step toward a safe and effective solution. A flue liner is the exhaust pipe for your fireplace—a hidden tube that contains intense heat and channels harmful gases safely outside. A crack in this liner is dangerous for reasons that aren’t immediately obvious. The Chimney Safety Institute of America (CSIA) considers a properly functioning liner essential for protecting your home from fire and your family from carbon monoxide. Understanding the risks is crucial before exploring your repair options. What Is a Flue Liner and Why Is It in My Chimney? Your chimney may look like a solid column of bricks, but there’s a critical safety component hidden inside: the flue liner. It’s a continuous, fireproof tube running from your fireplace to the chimney top, designed to contain the fire’s byproducts and guide them safely outside. Without it, your chimney is just a brick shell. A flue liner has three critical jobs: Is a Cracked Flue Liner Really Dangerous? The Two Biggest Risks A damaged flue liner introduces two immediate and serious dangers into your home every time you light a fire, turning a cozy evening into a significant gamble. The first major risk is a house fire. While your chimney’s masonry seems fireproof, it doesn’t stop heat from slowly passing through it. A crack in the liner allows intense heat to reach the brick and then transfer directly to your house’s wooden frame. Over time, this constant heating can “cook” the wood, lowering its ignition temperature until it can spontaneously catch fire. The liner is your only real defense against this slow-burn danger. The second risk is carbon monoxide (CO) poisoning. CO is an invisible, odorless gas produced by any fire, and it’s deadly. A sound liner ensures this poison gas is channeled up and out of your home. When the liner is cracked, CO can escape through the breach and seep into your walls, attic, and eventually your living areas. Because you can’t see or smell it, you may not be aware of the danger until it’s too late. Because of these severe risks, the CSIA states that a chimney with a breached liner should not be used until it is professionally repaired. The potential consequences are simply too high. 5 Telltale Signs of a Damaged Flue Liner Since you can’t see deep inside your chimney, you must rely on the clues a damaged liner leaves behind. These symptoms of a damaged flue liner are your home’s early warning system, signaling it’s time to stop using the fireplace and call a professional for a closer look. Look for any of these five red flags, as even one can indicate a serious issue that requires a professional chimney inspection for cracks: Finding these signs, especially pieces that point to the need for fixing gaps in terracotta flue tiles, means your chimney’s primary defense is compromised. While these clues strongly suggest a problem, only a certified chimney professional with a special camera can confirm the damage. Repair vs. Replacement: Your 3 Main Options for Fixing a Cracked Liner Once a professional confirms your liner is cracked, the conversation shifts from diagnosis to solution. Deciding between flue liner repair vs. replacement depends on the type and severity of the damage. While patching a minor crack is sometimes possible, most situations require relining—giving your chimney a brand-new, safe exhaust path. What’s the Cost to Fix a Chimney Liner? A Realistic Budget Guide The cost to fix a chimney liner depends heavily on the chosen method. A sealant application might cost several hundred dollars, while a full relining—whether with stainless steel or a cast-in-place system—is a more significant investment, typically ranging from $2,500 to $7,000 or more. That price range is wide because no two chimneys are alike. The final quote will depend on the chimney’s height, the complexity of its path (bends or “offsets” add cost), and roof accessibility. While it’s tempting to opt for the cheapest patch, it’s crucial to weigh cost against long-term value. A patch is a spot treatment, like fixing a single pothole. A professional chimney relining service, on the other hand, gives you a brand-new, safe, and efficient system that provides decades of peace of mind. The Big DIY Question: Can I Repair My Own Flue Liner? In your research, you will find DIY chimney liner repair kits or sealants online. While tempting, these products are designed for minor mortar joint touch-ups, not for fixing the structural cracks that pose a genuine fire risk. Using one on a compromised liner is like putting a small patch on a leaky radiator hose—it fails to fix the dangerous underlying weakness. The stakes are too high for a weekend project. An improper repair isn’t obvious like a bad paint job; it’s a hidden failure that can allow intense heat to reach your home’s wood framing or let deadly carbon monoxide seep into living areas. Safely answering “can you repair a cracked clay flue liner?” requires specialized video scanning equipment to diagnose the full extent of the damage and, more importantly, to verify that the repair is flawless. This is a job where certainty is non-negotiable, making it one to leave to a certified technician. Your Action Plan: How to Hire the Right Professional That initial, worrying report of a “cracked flue liner” no longer needs to be intimidating. You now understand the risks and have a clear roadmap for finding a trustworthy solution. Your first step is to schedule a proper chimney inspection for cracks with a CSIA certified chimney sweep. As you vet any professional chimney relining service, use these five critical questions to guide your conversation: Questions to Ask Your Chimney Pro: Armed with this knowledge, you’re no longer just hoping for an honest assessment—you’re ensuring one. By taking these deliberate steps, you are not just repairing a component; you are restoring
How to Unblock a Bathroom Sink

A clogged bathroom sink can be a real nuisance, disrupting your daily routine. The frustration of standing water or slow draining can be quite annoying, but fear not, because with a few straightforward steps, you can tackle this issue head-on. In this guide, we’ll explore various methods How to Unblock a Bathroom Sink, with a focus on techniques you can easily perform at home. Whether you’re looking for natural remedies or need to bring in the heavy artillery, we’ve got you covered. Not only will these methods save you time and money, but they can also extend the life of your plumbing fixtures by avoiding harsh chemicals. Before diving into the solutions, it’s essential to understand what typically causes a sink clog. Hair, soap scum, toothpaste, and debris are the usual suspects. These materials can gradually build up in your drain, creating a blockage over time. Knowing the cause can help you prevent future clogs and choose the most effective method to clear them. Hair, for example, can form tangled clumps that catch other debris, while soap scum can harden and adhere to the walls of your pipes, narrowing the passageway. Understanding these dynamics can guide your choice of tools and methods, ensuring that you address the root of the problem rather than just the symptoms. How to Unblock a Bathroom Sink at Home Method 1: Using Boiling Water One of the simplest and most cost-effective methods to unclog a drain is by using boiling water. This method is particularly effective for minor clogs caused by soap and grease, as the heat can melt and dislodge these substances. Boiling water is an excellent first step because it’s easy and requires no special equipment. However, it’s worth noting that this method might not work on more substantial clogs, especially if they are composed of hair or other solid materials. If the issue persists after trying boiling water, you may need to move on to more intensive methods. Method 2: Baking Soda and Vinegar A natural, yet effective method involves using baking soda and vinegar. This combination creates a chemical reaction that can help dissolve the clog, providing a non-toxic alternative to commercial drain cleaners. This method is eco-friendly and cost-effective, making it a favorite for those who prefer to avoid chemicals. However, it may not work for severe blockages, and repeated treatments might be needed for stubborn clogs. Method 3: The Plunger Technique If you have a plunger on hand, this traditional tool can be highly effective for unclogging a bathroom sink. Plungers create a vacuum effect that can dislodge clogs physically. The plunger method is a straightforward mechanical solution and can be remarkably effective for clogs caused by compacted debris. It’s also a good workout for your arms! Method 4: Removing and Cleaning the P-Trap The P-trap is the curved section of pipe beneath your sink. It can often be a collection point for debris and clogs. Cleaning it can resolve many blockage issues. While this method requires a bit more effort and possibly some tools, it is highly effective for persistent blockages. It’s also a good opportunity to inspect the condition of your pipes. How to Unblock a Bathroom Sink Without a Plunger If you don’t have a plunger, you can still clear blockages using alternative methods. These approaches can be just as effective, especially for less severe clogs. Method 5: Wire Hanger or Drain Snake A wire hanger can be fashioned into a makeshift drain snake, or you can use a professional drain snake for more stubborn clogs. This method involves physically removing the blockage. This technique is simple and uses materials you likely have at home. It’s a great option for those who want a quick fix without purchasing additional tools. Method 6: Enzymatic Drain Cleaners For those who prefer a chemical-free approach, enzymatic drain cleaners use natural enzymes to break down organic matter. They are a gentle yet effective option for routine maintenance. Enzymatic cleaners are excellent for regular maintenance and prevention, keeping your drains clear without the need for harsh interventions. They are also safe for septic systems. How Much to Unblock a Bathroom Sink? If DIY methods fail, you may need to call a plumber. The cost to unblock a bathroom sink can vary based on location, complexity, and the plumber’s rates. In the UK, you might expect to pay between £50 to £100 for a professional service. Always request a quote before proceeding. While professional help can be more expensive, it ensures that the problem is thoroughly addressed. Plumbers have specialized tools and expertise to handle more complex issues that DIY methods might not resolve. Consider professional assistance if you encounter recurring clogs or suspect a more significant plumbing problem. Preventing Future Clogs Prevention is key to avoiding future plumbing issues. Here are some tips to keep your bathroom sink draining smoothly: By incorporating these preventive measures into your routine, you can reduce the frequency and severity of clogs. Regular maintenance not only saves time and effort but also extends the lifespan of your plumbing system. Conclusion Unblocking a bathroom sink doesn’t have to be a daunting task. With these practical tips and methods, you can tackle most clogs without professional help. Whether you choose to use natural remedies or mechanical tools, understanding the cause of the blockage and taking preventive measures will keep your bathroom sink in top condition. Remember, if you encounter persistent clogs or complex plumbing issues, it’s wise to consult a professional plumber to avoid damaging your plumbing system. Taking action at the first sign of trouble can prevent minor issues from becoming major headaches. Happy unclogging! Read our others blogs
The Home Depot Review: The World’s Largest Home Improvement Retailer

The Home Depot is widely recognized as the world’s largest home improvement retailer, serving millions of homeowners, contractors, and DIY enthusiasts across North America. Founded in 1978, the brand has built a dominant presence through its extensive product range, in-store expertise, and a rapidly expanding ecosystem of professional home services. Today, The Home Depot is not only a retail giant but also a primary search destination for Home Depot Home Services, covering everything from installation to large-scale renovation projects. Overview of The Home Depot The Home Depot operates thousands of warehouse-style stores across the United States, Canada, and Mexico. Its core strength lies in offering a one-stop solution for home improvement needs, including tools, building materials, appliances, décor, and outdoor products. What sets The Home Depot apart is its ability to integrate retail with professional-grade services, creating a seamless experience for both DIY customers and homeowners seeking expert installation. Home Depot Home Services: A Key Competitive Advantage One of the strongest pillars of The Home Depot’s brand authority is Home Depot Home Services. These services are designed for homeowners who prefer professional installation rather than self-managed projects. Key service categories include: All services are managed through vetted local contractors, with project oversight handled by The Home Depot. This model builds trust, simplifies project management, and reduces risk for customers. Customer Experience and Trust Signals The Home Depot has invested heavily in trust-building mechanisms, especially for Home Services customers: These factors contribute to strong brand recognition and consistent consumer trust, particularly among homeowners searching for reliable home improvement services. Digital Presence and Search Authority From an SEO and digital marketing perspective, The Home Depot holds exceptional authority: For searches related to “Home Depot Home Services”, the brand often dominates top search positions due to its structured service pages, location-based optimization, and strong backlink profile. Pros and Cons of Home Depot Home Services Pros Cons Official Website and Online Presence Primary Website Corporate Site Investor Relations (Financials & News) Official Social Media Profiles These are the primary social channels where The Home Depot actively engages audiences and publishes updates (products, promotions, tips, corporate news): Mobile Apps Corporate and Brand Elements to Include in Review Headquarters & Operational Scale Leadership Corporate Initiatives Brand Identity Final Verdict The Home Depot remains the undisputed leader in the home improvement retail space, and its expansion into professional services has further strengthened its market position. For homeowners searching for Home Depot Home Services, the brand offers reliability, scale, and peace of mind that few competitors can match. While pricing may not always be the lowest, the combination of brand trust, service guarantees, and nationwide availability makes The Home Depot a top choice for both small upgrades and major home renovation projects. Frequently Asked Questions About The Home Depot What is The Home Depot? The Home Depot is the world’s largest home improvement retailer, offering tools, building materials, appliances, décor, and professional home services across North America. Does The Home Depot offer home installation services? Yes. Through Home Depot Home Services, customers can access professional installation for flooring, kitchens, bathrooms, HVAC systems, windows, roofing, and more. Is The Home Depot reliable for home services? The Home Depot works with licensed and insured local contractors and provides service warranties, making it a trusted option for home improvement projects. Where is The Home Depot headquartered? The Home Depot is headquartered in Atlanta, Georgia, USA, and operates thousands of stores across the United States, Canada, and Mexico. Does The Home Depot have an official website and social media? Yes. The Home Depot operates an official website and maintains active profiles on platforms such as Facebook, Instagram, YouTube, LinkedIn, Pinterest, and X. Who is the CEO of The Home Depot? Ted Decker serves as President and Chief Executive Officer of The Home Depot.
How To Get Roofing Leads in 2026

Generating roofing leads in 2026 requires a blend of traditional and digital strategies. The roofing industry is evolving, and so are the methods to attract potential customers. Understanding your target market is crucial. Knowing who your ideal customers are can significantly impact your lead generation efforts. Roofing SEO plays a vital role in improving online visibility. It helps roofing businesses rank higher in search results, attracting more organic leads. A Roofing Company Organic Marketing Specialist can craft effective strategies. They focus on engaging potential customers through various online platforms. Social media is a powerful tool for generating roofing leads. It allows businesses to connect with potential customers and showcase their services. Content marketing, including blogs and videos, establishes authority. It attracts leads by providing valuable information to potential customers. Local SEO and Google Business Profiles are essential for targeting local customers. They enhance visibility in local search results, driving more leads. Understanding the 2026 Roofing Lead Landscape The roofing industry is experiencing significant changes in 2026. New technologies and customer expectations shape how businesses generate leads. Understanding the current landscape is crucial for success. Adapting to these changes will help you stay competitive. Roofing customers are more informed than ever. They conduct thorough research before choosing a contractor. This means your marketing efforts must focus on building trust and credibility. Digital channels play a dominant role in lead generation. Roofing businesses need a strong online presence to reach potential customers effectively. Traditional methods are still relevant, though they must be integrated with digital strategies for optimal results. Here are key points to consider: Networking remains important, offering opportunities for partnerships and collaborations. Engaging with communities and other businesses can open doors to new roofing opportunities. Defining Your Ideal Roofing Customer and Market Identifying your ideal roofing customer is crucial for effective lead generation. Start by understanding who benefits most from your services. Consider demographics such as age, income level, and location. This information helps tailor your marketing messages. Focus on customer pain points. Common concerns include roof durability, energy efficiency, and cost. Address these issues in your marketing materials to resonate with potential customers. Creating detailed customer personas can guide your marketing strategies. These profiles should include: Understanding your competition is also essential. Analyze their strengths and weaknesses to find market gaps. This research can uncover opportunities for differentiation and innovation. Once you’ve defined your target market, direct your efforts toward reaching them effectively. Customize your campaigns to address their specific needs and preferences. This approach builds a lasting connection with prospects, ultimately leading to more roofing sales and business growth. Building a High-Converting Roofing Website Creating a high-converting website is essential for capturing roofing leads in 2026. A professional, user-friendly design leaves a lasting impression. Ensure your site is easy to navigate. Simple and intuitive layouts enhance user experience and encourage visitors to explore further. Speed matters too. A fast-loading website prevents potential customers from leaving in frustration. Optimize images and scripts to boost load times and improve search rankings. Prioritize clear calls-to-action (CTAs) on every page. CTAs guide visitors toward desired actions like requesting quotes or scheduling consultations. They should be prominent and compelling. Important elements to include: Consider mobile responsiveness crucial. With increasing mobile web use, a responsive design ensures accessibility across devices. This expands your reach and enhances customer satisfaction. Incorporate live chat features to engage visitors directly. Prompt responses to inquiries increase conversion potential and improve the overall user experience. Roofing SEO: Ranking Higher and Attracting Organic Leads Roofing SEO is the driving force behind organic lead generation. With the right strategies, your website can rank higher on search engines. Implementing effective SEO practices attracts more visitors and potential customers. Begin with keyword research. Identify terms that potential roofing customers are likely to search for. Use these keywords strategically across your website content. On-page SEO is critical. Optimize title tags, meta descriptions, and headers. These elements help search engines understand your content and rank it effectively. Building quality backlinks is another essential aspect. Backlinks from reputable sites enhance credibility and boost ranking. Aim to connect with local businesses for guest posting opportunities or partnerships. Focus on producing valuable and authoritative content. Blogs and informational pages can drive traffic. Content should address common roofing queries and offer solutions. Important SEO practices include: Technical SEO is equally important. Ensure that your website’s structure is crawlable by search engines. Correcting broken links and improving site architecture can positively impact rankings. For visual context, here’s an image illustrating effective Roofing SEO strategies: Leveraging Local SEO and Google Business Profile Local SEO is crucial for roofing businesses aiming to attract customers within specific geographical areas. It maximizes your visibility to local roofing customers actively searching for services nearby. Start by optimizing your Google Business Profile. Ensure all details, including address, contact number, and business hours, are accurate and up to date. This improves your chances of appearing in local search results. Encourage satisfied customers to leave reviews on your Google profile. Positive reviews build trust and enhance your local ranking. Respond to reviews to show engagement and professionalism. Local keywords are vital for local SEO success. Use them in your website content, blog posts, and Google Business Profile description. This helps search engines connect your business to local queries. Another key to success is building local citations. Ensure your business is listed consistently on local directories and platforms. Important practices include: Content Marketing: Blogs, Videos, and Authority Building Content marketing is essential in establishing your roofing business as an authority in the industry. High-quality content, such as blogs and videos, can attract and educate potential customers. Start by creating a blog on your website. Regular blog posts about roofing tips, industry news, and common roofing problems can engage readers and improve your SEO ranking. The goal is to provide value and establish trust. Videos are another powerful tool. They can showcase your roofing projects, provide DIY tips, or explain complex roofing concepts. Videos tend to have higher engagement rates
15 Small Bathroom Designs with Shower and Toilet for 2026
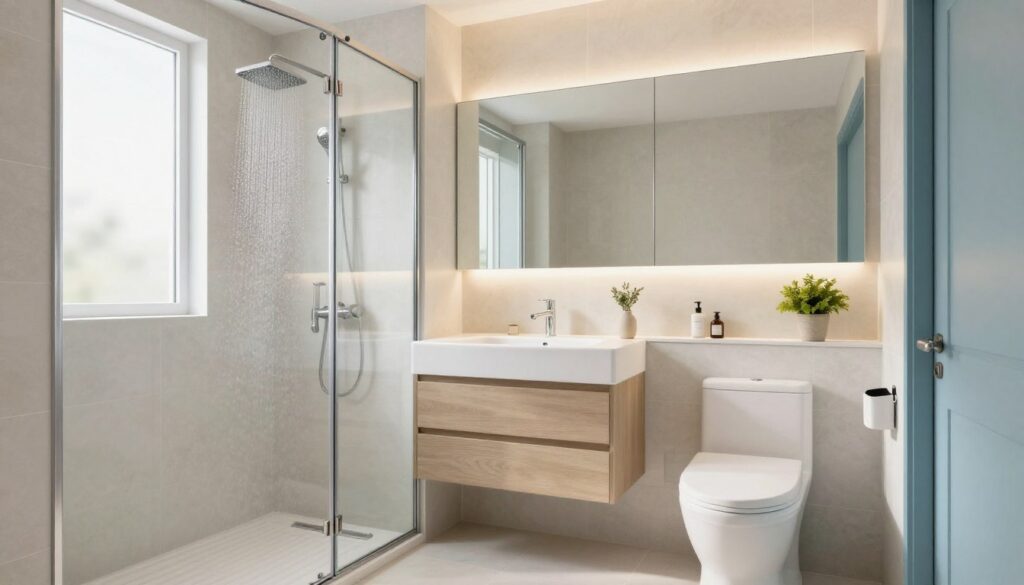
We all know the struggle. You step out of the shower and immediately bump your elbow on the towel rack, or you have to squeeze sideways just to get past the vanity. Navigating a small bathroom can feel like an obstacle course. Yet, as living spaces in urban centers continue to shrink and homeowners look to maximize every square foot of their floor plans, the tiny bathroom has become a primary focus of interior design. Designing a functional bathroom that includes both a shower and a toilet within a limited footprint is one of the toughest architectural challenges. It requires a delicate balance of ergonomics, plumbing logic, and aesthetic appeal. As we look toward 2026, the trends aren’t just about making things smaller; they are about smarter integration, sustainable materials, and technology that reduces clutter. A cramped washroom doesn’t have to feel claustrophobic. With the right layout and visual tricks, you can turn a closet-sized utility room into a spa-like retreat. This guide explores the principles of space-saving design and offers concrete ideas to revolutionize your small bathroom. Understanding Space-Saving Principles Before ripping out tiles or buying a petite sink, it is vital to understand the core principles that make a small space feel larger. Successful design in 2026 relies on four main pillars: visual continuity, verticality, floating elements, and lighting. Visual Continuity involves removing barriers for the eye. When your eye stops at a shower curb, a vanity leg, or a thick door frame, the room registers as smaller. By using continuous flooring or clear glass, you trick the brain into perceiving the total square footage of the room rather than chopped-up segments. Verticality utilizes the “dead space” that exists above eye level. In a small footprint, you cannot build out, so you must build up. Tall cabinets, high-mounted shower heads, and vertical tile patterns draw the eye upward, emphasizing ceiling height rather than narrow walls. Floating Elements are crucial for floor visibility. The more floor you can see, the larger the room feels. Wall-mounted toilets and vanities expose the flooring underneath, creating a sense of openness that grounded cabinetry destroys. Lighting is the final, and perhaps most important, principle. Shadows are the enemy of small spaces. A well-lit room with layered lighting (task, ambient, and accent) eliminates dark corners that make walls feel like they are closing in. Compact bathrooms need smart design to use space well. As we look ahead to 2026, people are searching for inspiration for their bathroom makeovers. Small bathroom designs with a shower and toilet can be tough. But, with clever ideas, you can make a space that’s both useful and looks great. This article will show you 15 new designs to spark your next bathroom makeover. You’ll find the perfect mix of style and function for your small bathroom. Key Takeaways Small Bathroom Design Challenges and Opportunities Small bathrooms come with their own set of design challenges. But, they also offer chances for creative solutions. The key is to plan carefully to make the bathroom both useful and good-looking. Current Trends in Compact Bathroom Spaces Today, minimalist designs and multi-functional fixtures are popular in small bathrooms. These trends make small spaces feel open and efficient. Some top ideas include: Benefits of Optimizing Small Bathroom Layouts Optimizing small bathroom layouts has many benefits. It improves both function and looks. A well-designed small bathroom can: By using modern bathroom layout ideas and renovation tips, homeowners can turn their small bathrooms into beautiful and useful spaces. Small Bathroom Designs with Shower and Toilet for Modern Homes Modern homes are looking for space-saving bathroom designs that are stylish and functional. We will explore 15 small bathroom designs that include showers and toilets. These designs cater to different tastes and needs. Minimalist Designs for Ultra-Compact Spaces Minimalist designs are great for small bathrooms. They focus on simplicity and function. These designs have clean lines and minimal decor. 15 Space-Saving Design Ideas for Small Bathrooms with Shower and Toilet Here are 15 design strategies tailored for compact bathrooms, blending upcoming 2026 trends with timeless functionality. 1. The Essence of Minimalism Minimalism is not just a trend; it’s a philosophy that embraces simplicity and functionality. In a small bathroom, this can be achieved by focusing on essential elements and removing excess clutter. This approach not only makes the space appear larger but also provides a calming atmosphere, essential for relaxation. Neutral Color Palette Opting for a neutral color palette helps in creating a serene and uncluttered environment. Whites, beiges, and light grays are perfect choices as they reflect light and enhance the sense of space. These colors serve as a blank canvas, allowing you to introduce subtle accents without overwhelming the space. Minimal Decor and Clean Lines Minimal decor doesn’t mean devoid of personality. Incorporate sleek fixtures and finishes that complement the overall aesthetic. Clean lines in your cabinetry and fixtures can create a streamlined look, making even the smallest bathrooms feel spacious and organized. 2. Use Vertical Space When floor space is limited, it’s crucial to think vertically. This involves utilizing the often-overlooked areas above eye level to maximize storage and functionality. 2.1 Shelves Above Fixtures Installing shelves or cabinets above the toilet or shower can significantly enhance storage capacity. These areas are perfect for storing toiletries and towels, keeping the floor area clear and the bathroom organized. Consider using adjustable shelving for flexibility and to accommodate items of various heights. 2.2 Floating Shelves Floating shelves are a fantastic way to add storage without taking up too much space. They provide a place for decorative items and essentials, blending functionality with style. Choose materials that match your bathroom’s overall theme, whether it’s rustic wood or sleek glass. 2.3 Tall Cabinets Tall, narrow cabinets can fit snugly into corners or beside a shower, offering ample storage without dominating the room. This type of cabinetry can house everything from cleaning supplies to personal grooming tools, keeping your bathroom tidy and efficient. 3. Opt for Glass Shower Enclosures Visual Transparency
5-Stage Reverse Osmosis Drinking Water System

Having clean drinking water is key for staying healthy. Many people are worried about water quality. So, they’re looking for better ways to purify their water. A 5-stage reverse osmosis drinking water system is a top choice. It offers a complete way to filter water. This system gets rid of bad stuff, making water safe to drink. Having a good water filter is very important. With a 5-stage reverse osmosis system, you can have clean water at home. No more worries about impurities or contaminants. Key Takeaways The Importance of Clean Drinking Water Clean drinking water is key for our survival and health. The quality of our water affects our well-being. It’s important to know about tap water contaminants and the benefits of purified water. Common Contaminants in Tap Water Tap water can have harmful substances like lead, chlorine, and bacteria. These can harm our health. They come from old pipes, farm runoff, and industrial waste. Drinking water with these contaminants can cause many health problems. These range from stomach issues to serious diseases like cancer. Health Benefits of Purified Water Purified water, however, has many health perks. It can improve digestion, boost energy, and enhance health. It’s free from harmful substances and minerals. Using a 5-stage reverse osmosis system can remove impurities. This gives you clean water for your family. The benefits of purified water are clear. Adding a good water purification system at home can greatly improve your water quality. How a 5-Stage Reverse Osmosis Drinking Water System Works for Home Use The 5-stage reverse osmosis system makes clean drinking water. It filters water in several steps. This makes sure the water is clean and tastes good. The Science Behind Reverse Osmosis Reverse osmosis uses a special membrane to clean water. It pushes water through tiny pores. This blocks bad stuff, letting only clean water through. Detailed Breakdown of Each Filtration Stage A 5-stage system has different filters for different contaminants. Stage 1: Sediment Filter The first filter catches big particles like dust and dirt. Stage 2: Carbon Block Pre-Filter The second filter removes chlorine and bad smells. It makes the water better. Stage 3: Carbon Block Filter The third filter uses carbon to get rid of any remaining bad tastes or smells. Stage 4: Reverse Osmosis Membrane The fourth stage is the reverse osmosis membrane. It takes out dissolved solids and heavy metals. This makes the water very pure. Stage 5: Post-Carbon Filter The last stage is a post-carbon filter. It polishes the water. This makes it taste clean and fresh. Benefits Over Standard Water Filters A 5-stage system has many advantages. It improves water taste, removes more contaminants, and is cost-effective in the long run. Homeowners get clean, safe, and tasty drinking water. Top-Rated 5-Stage Reverse Osmosis Drinking Water Systems in the US 5-stage reverse osmosis drinking water systems are popular in the US. They clean and purify water, removing harmful substances. This makes the water safe and tastes good. The US has many of these systems, each with special features. We’ll look at some of the best ones. APEC Water Systems ROES-50 The APEC Water Systems ROES-50 is a top choice. It’s efficient and lasts long. It filters out up to 99% of contaminants like lead and chlorine. iSpring RCC7 The iSpring RCC7 is known for its effectiveness and eco-friendliness. It removes many contaminants and adds minerals back into the water. Home Master TMAFC-ERP The Home Master TMAFC-ERP offers high-quality water. It has a UV stage to kill bacteria and viruses, making the water safe. Express Water RO5DX The Express Water RO5DX is fast and efficient. It filters out up to 99% of contaminants, including dissolved solids and bacteria. Waterdrop G3 The Waterdrop G3 is a smart and efficient system. It has a remineralization stage and is easy to install and maintain. System Filtration Stages Contaminant Removal Additional Features APEC Water Systems ROES-50 5 Up to 99% Durable design iSpring RCC7 5 Up to 99% Remineralization stage Home Master TMAFC-ERP 5 Up to 99% UV sterilization Express Water RO5DX 5 Up to 99% Fast flow rate Waterdrop G3 5 Up to 99% Smart design, remineralization Choosing a 5-stage reverse osmosis system involves several factors. Look at filtration efficiency, extra features, and maintenance needs. The systems mentioned are among the best in the US, offering various benefits and features. Best 5-Stage Reverse Osmosis Systems Under $300 Finding clean drinking water doesn’t have to cost a lot. Many good 5-stage reverse osmosis systems are priced under $300. This makes it easy for people to get quality water without spending too much. Budget-Friendly Options Without Compromising Quality Many brands offer top-notch 5-stage reverse osmosis systems at low prices. For example, the APEC Water Systems ROES-50 and the iSpring RCC7 are great choices. They remove up to 99% of contaminants like lead, chlorine, and fluoride. Feature Comparison of Affordable Systems When looking at affordable 5-stage reverse osmosis systems, consider a few things. Look at filter life, flow rate, and extra features like remineralization or alkaline filters. The Home Master TMAFC-ERP, for example, has a high flow rate and adds minerals to improve taste and quality. Performance Analysis of Budget Systems When checking out budget-friendly 5-stage reverse osmosis systems, look at how well they perform. The Waterdrop G3, for example, filters water very well and is smartly designed. It’s a top pick in the under $300 range. System Filter Life Flow Rate APEC ROES-50 Up to 2 years 75 GPD iSpring RCC7 Up to 1 year 75 GPD Waterdrop G3 Up to 3 years 60 GPD Long-term Value Assessment When looking at the long-term value of affordable 5-stage reverse osmosis systems, think about more than just the initial cost. Consider ongoing expenses like filter replacements and maintenance. Systems with longer-lasting filters and easy maintenance are better value over time. In conclusion, the best 5-stage reverse osmosis systems under $300 offer great quality, performance, and affordability. By comparing features and considering long-term costs, you can make a smart choice that